
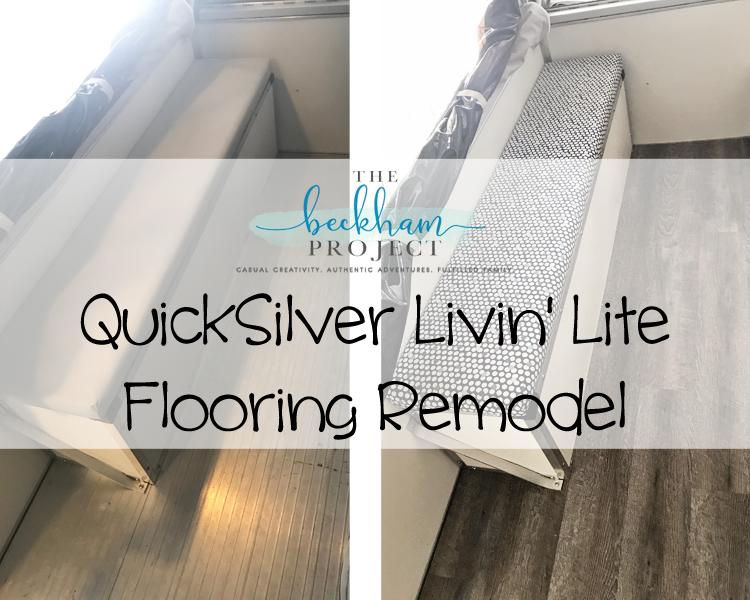
Adventures with our QuickSilver Livin’Lite Pop-Up: As I mentioned a few weeks ago, we bought a camper! I have been working hard to clean and get it ready for our first camping trip, which is coming up soon. My first order of business with our new-to-us QuickSilver 10.0 by Livin’ Lite was to update the flooring.
Changing Out the Flooring in our QuickSilver Livin’Lite
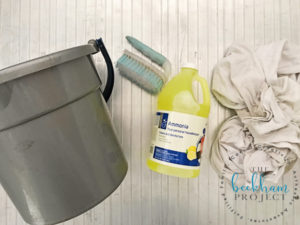
Since the current floor was aluminum there wasn’t anything to peel up, but I did want to make sure it was clean and free of grease and dirt. I used an Ammonia/water – 50/50 mix, a scrub brush and some rags to wipe away the liquid when I was done.

This whole process was pretty quick, but the fumes from the Ammonia can be pretty bad so make sure you’re working in a well ventilated area.
Choose a Flooring that’s Durable
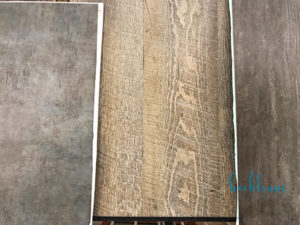
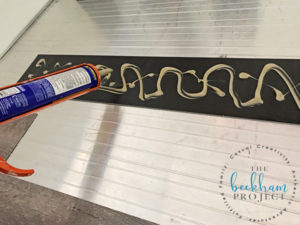
I choose the Driftwood/Grey option from Lowe’s and bought 1 box, which is 60 square feet of flooring. Even though the flooring is self adhesive I had read several reviews about the benefit of using an additional adhesive. The primary benefit is that the extra adhesive makes it easy to slide the planks into place so that you get a nice tight fit without a lot of gaps. I HIGHLY RECOMMEND USING EXTRA ADHESIVE!!!! Yes, I’m yelling at you.
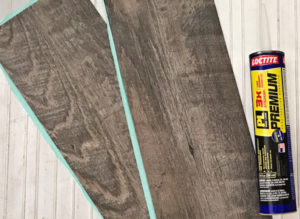
I purchased Loctite Premium Construction Adhesive after talking with every department at the hardware store. I used a total of 4 of the 10 ounce cartridges for the entire floor.
Go Slow and Double Check Your Measurements
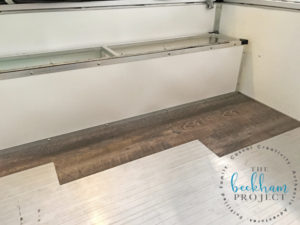
I started laying my planks in the corner that will be most visible in the camper. This is not what experts recommend, there’s all sorts of tutorials about finding the center of your camper so the edges are even. For me, the side opposite this one will be covered with benches and a table so I’d rather have the more exposed area look the best.
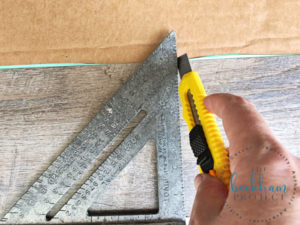
Before you get started make sure you have a straight edge and a nice sharp blade to work with. You’re going to need to cut a lot of planks throughout the process. When starting your flooring, you want to do 1 full plank, then cut 1/3 off a second plank. Your next plank will be the 2/3 piece, and then the 1/3 piece. This keeps all your seams from lining up in a row and looking all weird. I did NOT measure my 2/3 cuts, I just eyeballed it and guesstimated the distance.
Use an Additional Adhesive on the QuickSilver Livin’Lite Flooring
As I mentioned above, I highly recommend using an additional adhesive. The flooring is very sticky and if you accidentally place it down just a 1/4 inch away from the next plank you’ll have a gap and won’t be able to move it. If you use the extra adhesive you can slide it right up against the neighboring plank and get a nice, tight fit.
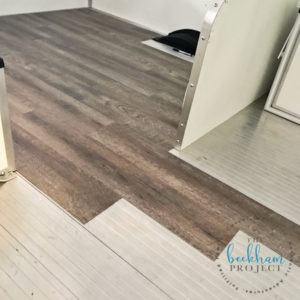
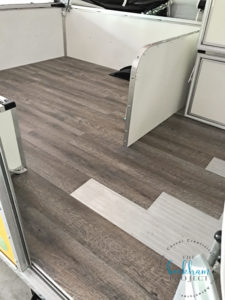
I worked my way across and down until the entire dinning area of the camper was covered. Honestly, the hardest part of this project was having to make all the cuts on the vinyl. The flooring I choose could be cut using a good pair of scissors and I did use them when making intricate cuts for some areas.
Enjoy your New Flooring
I continued working my way towards the front of the camper, cutting pieces as needed. Overall this project cost less than $100 and took 3 days to complete. You could easily do it all in one day, but I had to share my DIY time with caring for children and folding laundry.
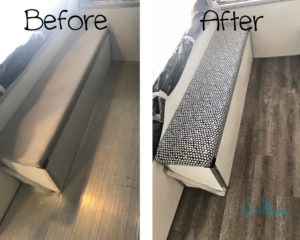
Be sure to check back because I’ll be posting some more updates, like that nicely recovered bench you see in the photo above.
Related Posts: Before Camper Pictures, Pop Up Camper Cushion Recovering

This post contains affiliate links, which means I receive a share of revenue if you make a purchase using these link. I always provide honest opinions and only to products I actually use and love.


Great post. On Memorial Day we towed home a 2007 LivinLite Quicksilver camper that’s at a glance identical down to the color!
We’re not ready to commit to flooring but we are shopping for fabric now to cover the marine grade cushions.
I hope ours turns out as nice!
We have the same camper! That floor is cold.
Does this make it a little warmer?
How is it holding u?
It totally makes it warmer, which is kind of why I decided to do it! We’ve had it down about a year now and it’s holding up very well. I think the key was to use the extra adhesive to put it down and not to just rely on the peel and stick backing.
Love your makeover! I’ve been fretting about extra glue and you convinced me! The “sliding” argument makes total sense!
Iris – it’s been almost 3 years since I did the flooring and it still looks amazing and none of it has peeled up. I highly recommend you go for it!
did you take out any of the cabinets?
Also, are the pieces thicker then like stickers?
I did not take out the cabinets and the stickers are very thin vinyl. Hope that helps!
Hello Shannon, love your remodel! I see that it has been several years you have had this installed. Wondering, do you have any concerns or signs of moisture damage so far? Do you know if it added much weight?
Michelle – We’ve had NO issues with moisture damage to any of the upgrades I made. The flooring still looks fantastic and isn’t pulling up at all. As far as the weight, I’m sure it added a little, but I’m still able to pull the camper with my Honda van.