
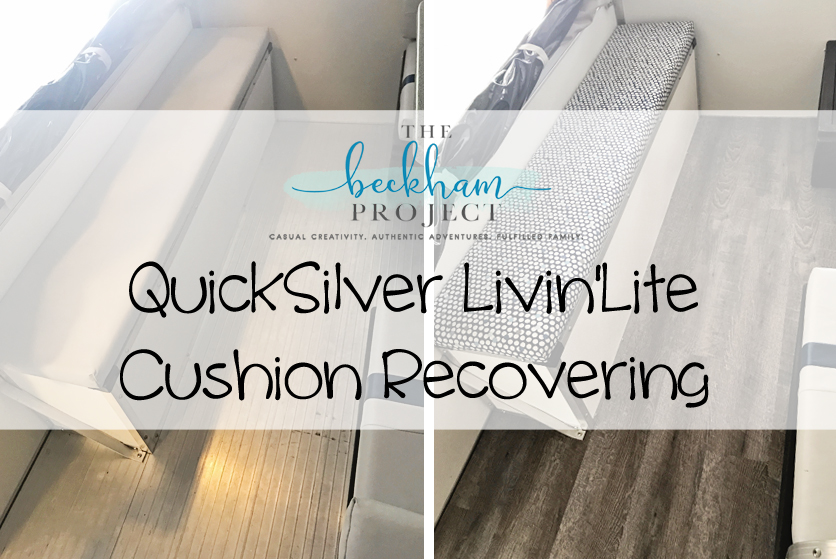
As I mentioned a few weeks ago, we bought a camper! I have been working hard to clean and get it ready for our first camping trip, which is coming up soon. We are loving our QuickSilver 10.0 by Livin’ Lite and once the flooring was updated, it was time to reupholster the cushions.
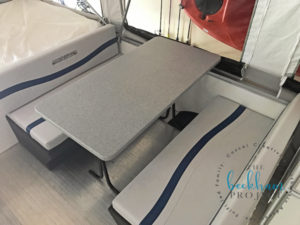
I’m going to be honest with you, the decision to recover the cushions was a tough one. At first I wasn’t even going to bother. The standard material that Livin’ Lite uses is marine grade and waterproof. It’s perfect for a family with kids and/or pets. But for me it just didn’t feel very homey. So I decided to go ahead and purchase some fabric and recover all the cushions.
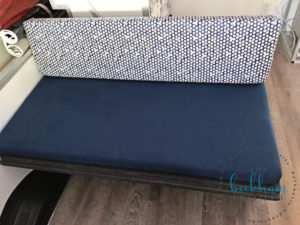
I decided to begin my reupholstering with the build in bench. Using a drill, I removed the screws from the bench side of the piano hinge. This wasn’t hard, except that you have to hold the bench at a weird angel to get them all off. I put the screws in a plastic bag so I didn’t lose them.
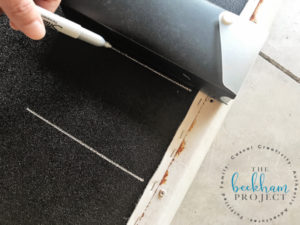
Next, I took a straight edge (in this case my kid’s pencil box) and a silver Sharpie and drew a line straight out from the holes where the screws had been. This seems like a silly step, but you’ll be happy you did it once you staple on your new fabric.
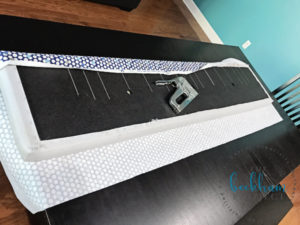
I laid my fabric out on the dining room table and put my cushion face down on top of it. Then I used my handy Staple Gun and stapled around the sides of the fabric, pulling it tight as I went. I did NOT add any additional batting
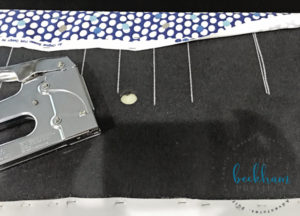
Once you pull the fabric all the way around you won’t be able to see where your original drill holes are, now aren’t you glad you drew those lines before you started?
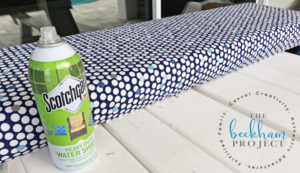
Before reinstalling I sprayed the crap out of it with a heavy duty outdoor Scotchguard spray. Allow it to dry completely before screwing the bench back on. I used 2 cans of this spray to cover the built in bench and 4 dinette cushions.
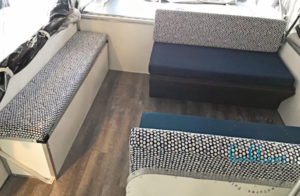
Next up was the dinette cushions. Originally I had planned to bust out the sewing machine and sew zippered cushions that could be removed. At the last minute I changed my mind and just decided to use the staple method for these as well.
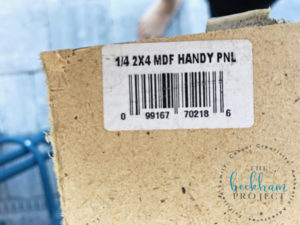
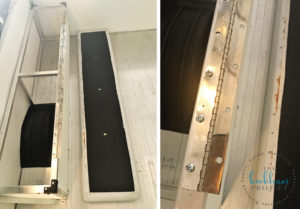
I went out and bought 3 sheets of 1/4″ 2×4 MDF. I was going to have them cut it for me at the hardware store, but since Hurricane Irma had just passed through town, the hardware store employees weren’t really up to it (who can blame them).

Using my favorite saw, I cut 2 boards 47″ x 22″ and the last one I cut into 2 pieces 47″ x 11″. The MDF was very easy to cut. If you don’t have a saw, make sure you find a hardware store that can make the cuts for you. Once the MDF was cut, I layered the fabric, cushion and MDF on the dining room table and used the same pull and staple method that I had with the bench.
I didn’t use any extra batting with these either, just my new fabric over the original. I made sure to Scotchguard these cushions as well before putting them back in the camper. I spent under $100 altogether on the fabric, MDF and Scotchguard spray. It took 2 days to complete the project but you could easily do it all in 1 day if you weren’t chasing kids around at the same time.
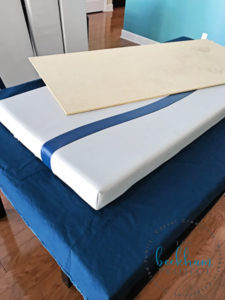
Be sure to check back because I’ll be posting some more updates, like that nicely recovered bench you see in the photo above.
Related Posts: Before Camper Pictures, Pop Up Camper Flooring Remodel

This post contains affiliate links, which means I receive a share of revenue if you make a purchase using these link. I always provide honest opinions and only to products I actually use and love.


This is really awesome!
What was the MDF for?
I used the MDF on the bottom of the cushions to create more stability and give me somewhere to staple the fabric to.